With 100 Percent Honesty, this blog is being written about a year after I have created the 3D scan, I'll try my best to remember everything as it was and some of this is gonna be copied and pasted from my MFA thesis paper. :)
I did several different experiments to see what would be the best result for scanning a head. At first I bough a computer screen Lazy Susan and had the subject stand on it. I added a green screen behind them and rotated the subject 10 degrees for each photo, taking photos at various heights. Then keyed out the green screen and used that key as a mask, to be imported as a separate file into PhotoScan.
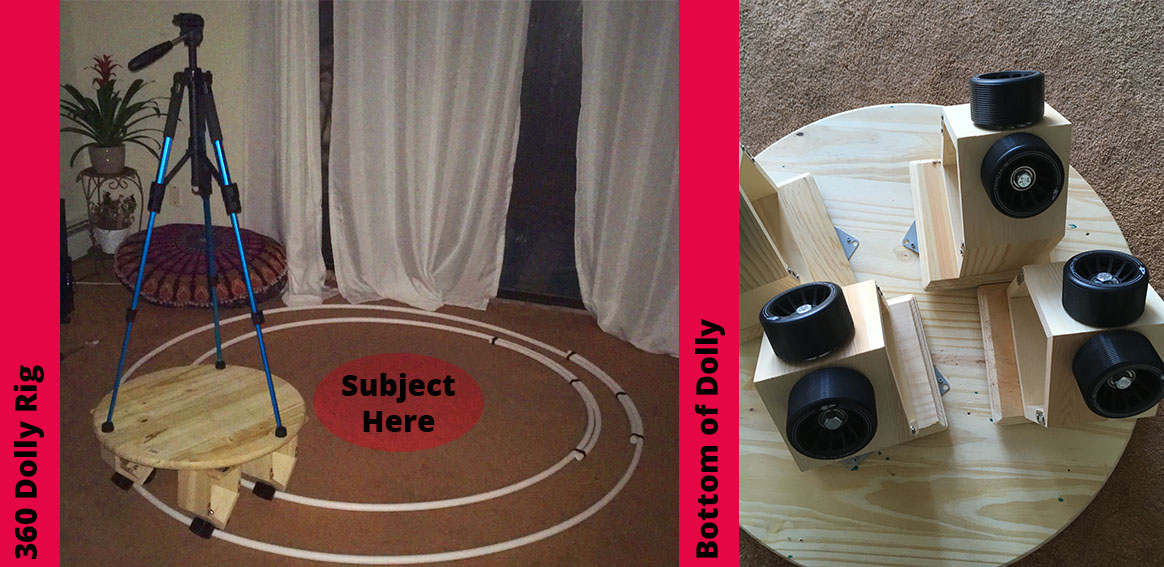
While this works......it takes a while to edit the photos. So instead I decided to build a rig that took up the entirely of my living room to rotate around my subject removing the need for a green screen.
Going to youtube I viewed a few tutorials as to how to create a 360 camera rig.
Just about everything you would need can be found at home depot or Loews, besides the wheels that I needed to order on amazon
But for around $60 Dollars
1 round piece of wood
4 angled wood
4 wood blocks
wheels X 8
PBC piping
Valcro for the tripod if you would like